Loose appliance cords and a drawer full of small tools often create the same problem: items that should be easy to put away have no defined resting place. Organizing both starts with the routine, not a matching set of containers. Decide which appliances stay on the counter, which tools are used beside them, and what must remain accessible while the appliance is operating. Then make the between-use storage simple enough to maintain.
Separate active use from storage
An appliance cord needs a clear, appropriate route during use. Follow the appliance manufacturer’s instructions for placement, cord handling and outlet use. A storage wrap is for organizing excess cord between uses; it is not a reason to route a cord close to heat, moving parts or a wet area.
Unplug an appliance as its instructions require before repositioning or storing it. Look for a location where a stored cord will not interfere with a vent, control, handle or lid. If the appliance’s surface is unsuitable for an adhesive accessory, choose another storage method rather than guessing that the adhesive will hold.
Match a cord holder to the surface
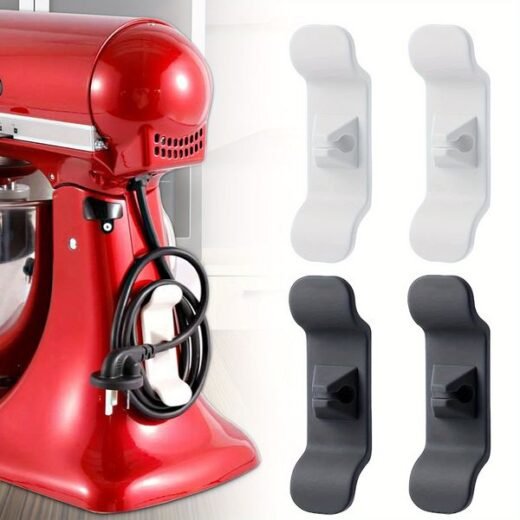
Adhesive appliance cord wraps provide four holders for grouping loose cords on suitable appliance surfaces. Before attaching one, read the supplied surface-preparation and mounting guidance. Check the proposed placement with the cord loosely arranged so you know the lid and other moving parts still have room.
Keep the plug easy to find. The goal is to remove an appliance from storage without a knot of neighboring cords. Labeling the storage location can help with several similar appliances, but avoid covering electrical information or instructions on the appliance itself.
Give small tools a home by task
Empty the utensil drawer and create groups such as measuring, opening, preparation and serving. Keep only the tools you use in the main drawer; occasional tools can live nearby without occupying the easiest space. Measure the usable drawer interior, including height beneath the cabinet frame and any intrusion from hardware.
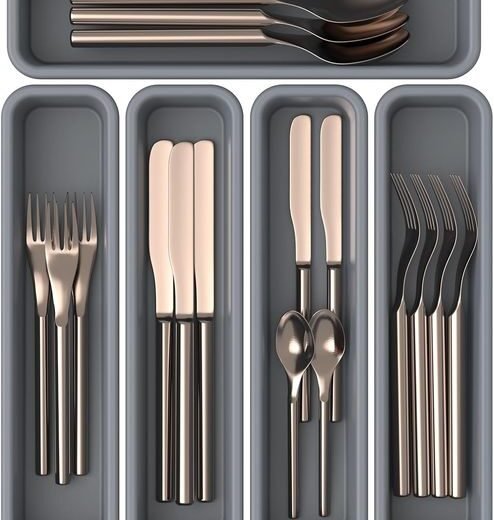
The five-piece silicone drawer organizer set allows the individual trays to be rearranged. Lay out their proposed positions before filling them. Check that the drawer closes with the tallest tool in place and that a long handle cannot catch on the frame. Leave a practical route for your fingers rather than filling every tray to its edge.
Decide whether a countertop caddy helps
Tools used in one location can be grouped above the counter if that is genuinely more convenient. The divided utensil caddy with towel holders has four compartments, two towel holders, hooks and a side basket. Its listed assembled size is 14.76 by 6.69 by 14.96 inches. Account for stored handles extending beyond that frame when you measure its location.
A caddy can be useful beside a serving or preparation station, but it should not block the clear surface needed to work. Put one task group into it and test a meal. If you keep retrieving the same tool from a drawer instead, the caddy may be in the wrong place or holding the wrong group.
Build a quick return routine
Before leaving the kitchen, return tools to their assigned group and organize appliance cords for storage according to their instructions. This takes less thought when the homes are obvious. If a tool lands repeatedly on top of an organizer, its compartment may be too full or too awkward to reach.
Review the arrangement after using every regular appliance once. Check whether retrieving one appliance drags a neighboring cord, whether a plug drops behind furniture, or whether a tray has become miscellaneous storage. Adjust those specific problems instead of adding more pieces.
The drawer and worktop measurements are the basis of this kitchen storage plan. The guide to adding counter levels without crowding the kitchen can help if your next step is moving a task group out of the drawer.
About these guides: RoomSprig uses AI-assisted writing and supplier product information to explain storage choices. Check the selected version, measurements and installation details on the individual product page.